When Dose of Metal asked me to do a regular guest column, I was sort of at a loss. On one hand, I love to write (even though I’m a much better artist than writer), but I was having a really hard time trying to decide what to talk about. I don’t particularly have any earth-shattering opinions on metal, I don’t have a band, and I’m also not a writer for Cracked.com and I really don’t have the time to research bizarre factoids and top 10 lists. So really, the only solution that I could think of that I know something about is art; heavy metal art specifically.
It’s not an industry that I am a seasoned veteran of, but I have been a professional artist in some capacity for about 11 years now. I remember what it was like to be 15 years old and see my favorite album cover, book, or comic and say to myself “I want to do that more than anything in the world”. So what I will talk about from here on out will most likely be less about “What’s your favorite metal album cover of all time?” and more about “How the hell do I get in touch with a band?” or “No one is writing me back! Does my portfolio suck?”. So if you are an artist aspiring to be in the heavy metal album cover industry (or maybe even not so specifically heavy metal, but any art industry), I think you will enjoy this column.
For my introductory article, I am going to start fairly simple and show you a little bit about who I am and how I approach a painting. And let’s get something straight here; yes, I am a digital painter. No, there is nothing wrong with that. There is a bad rap for digital artists that I see out there sometimes and it’s all bullshit. Someone who is lazy in Photoshop would be just as lazy with real paint. Photoshop (or any other program) is just another tool and in the hands of an experienced artist, he or she should be able to create something with the same amount of emotion as real paint. In a later article I will touch on this more, but for now let’s get to the art… After the jump.

The piece today will be a cover that I just finished for the band, Funerus, for their upcoming album Reduced to Sludge. When I first talked to the band, they were very open to my ideas of their album title which made me pretty happy because immediately after hearing the title, I had a vision for the cover.
Step One: The Idea.
Sometimes I have to do a lot of sketches, but with this one I knew right away that I wanted it to be a fairly simple, yet striking, person in the process of melting into the ground. I’m a big movie fan and my head was immediately filled with images of Raiders of the Lost Ark and Robocop.
Despite what anyone ever tells you, there are no original ideas out there in the world! Everything is a reference off of everything, no matter how hard you try to be original. So I try to embrace my influences and make things that strike the same chord but obviously with my own interpretation. That said, I tried to think of something that at least *I* have not seen before (not to say it doesn’t exist), and so I had the idea to have the face melting as one piece all the way down his body. The expression on it’s face showing that in some way it’s still feeling the agony of the thick, yellow gas that is eating his flesh away.
Step Two: The Line Art.
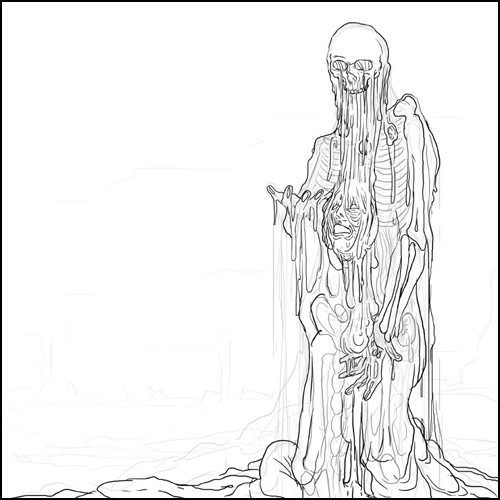
You might notice that the image is sketched within Photoshop itself. I don’t always start that way, it just depends on my mood. Sometimes I will do this part in pencil and scan it in, sometimes I will just eliminate the middle man and do it directly into Photoshop. For the curious, I use a Wacom 6×8 Intuos. As far as I am concerned, there is no other tablet other than Wacom. It’s the industry standard for a reason and the most current Intuos is always going to be your best bet. Mine is actually from 2001 and I paid 400.00 dollars for it. I have never felt the need to upgrade to a new one, because it still works perfectly! That is a quality product. Anyway, the lines here are pretty loose. I don’t really waste time with drawing a ton of the details out because when I start painting, I often discover details that come from “happy accidents” in my brushing. I may be swirling around some color and discovering a really interesting sore or pus-pocket that is appearing before me and decide to give that more detail. Why waste time on line-work that will eventually get erased/covered up anyway? If this was a comic book, I’d definitely spend more time on this stage, but since it’s a painting, there is no point.
Step Three: The Color Sketch.
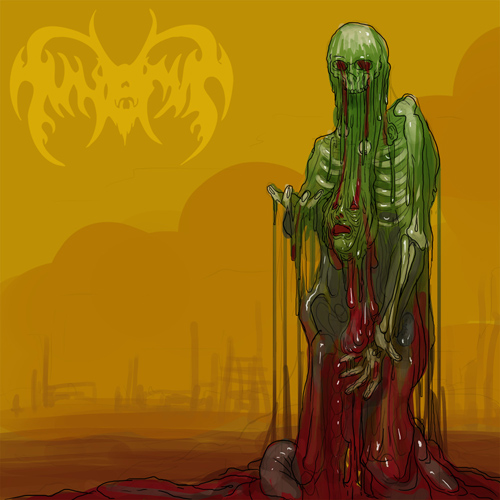
The next step is trying to figure out the basic color composition. The colors in this stage are never final, in fact I usually make them considerably brighter and full of color saturation so that when I send this to the client, they can see very clearly what I intend to do (which is the entire point of this stage, by the way. This is the image that I send away to get approval to continue to the next stage). When composing the colors, I really like to find a dominant color (in my case, usually a red of some type. Call it “fall-back” or “style”, it’s up to you!) and then only a few other main supporting colors. This helps give the piece a certain degree of “punch” or “intensity” so when someone sees it across the room, their eye is drawn to it. I also like to think of the way modern album covers are usually seen, i.e. as a thumbnail on Itunes or Amazon. Ideally, I’d like everyone to see my art as an oversized vinyl, but that isn’t the case most of the time. So choosing the right balance of color will help the piece look good at a very small size or a low resolution.
Step Four: Painting.
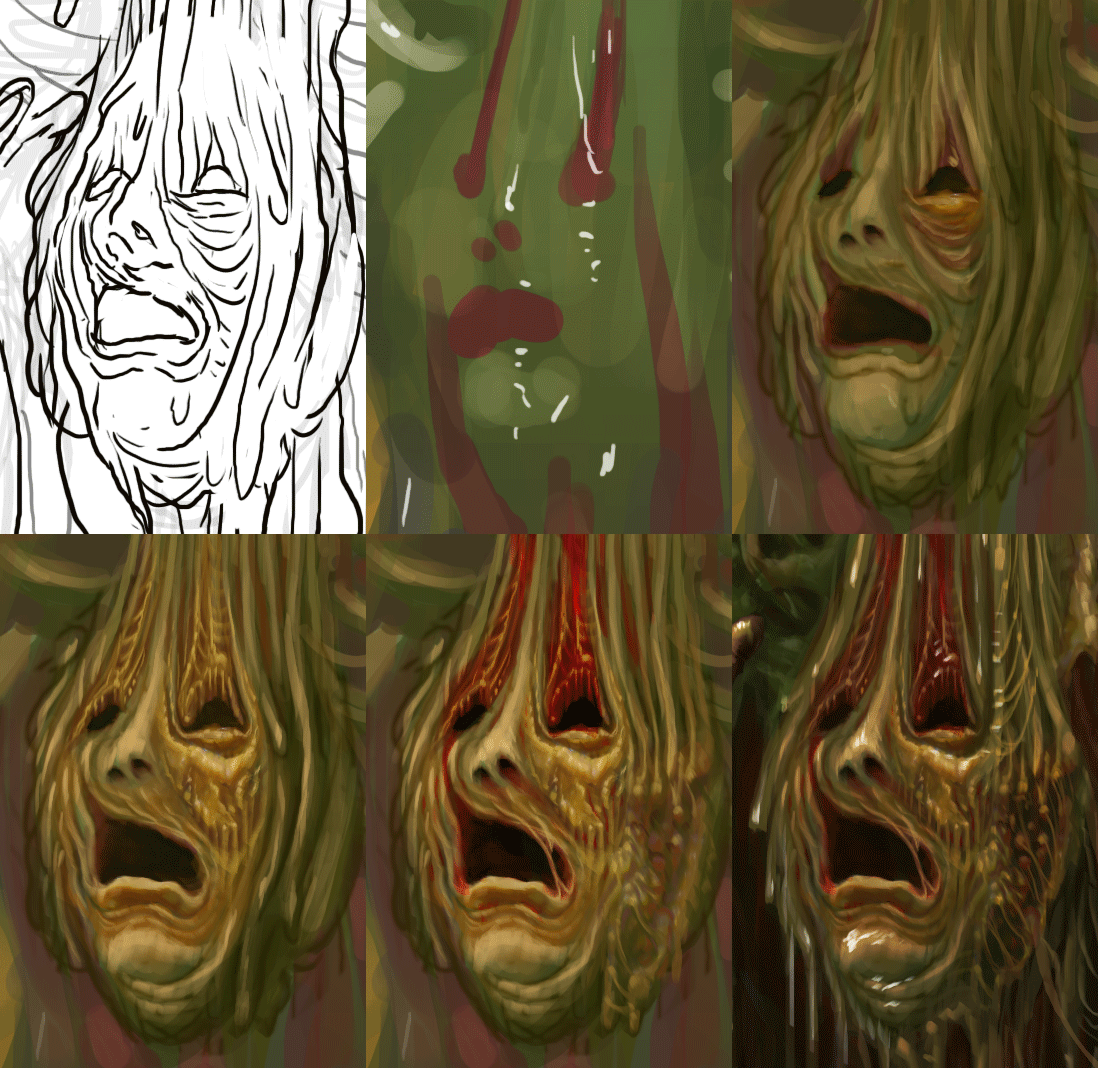
Even though this is a digital painting, I very much treat it in the same way I would as with real paint. I start with basic blobs and shapes and build my way up from there. I will usually keep the line-art set as “Multiply” over my painted layer so that I “keep within the lines”, but the details I keep really loose and organic. The more confident you are in your strokes, the better it will look, but of course confidence comes with time and experience. Also,the key is to go from dark to light. Start with a darker color or midtone and build up brighter colors on top of it. If it’s meant to be slippery and slimy, throw a couple splotches of white on top of it and you’ve got something that is wet. As you can see from the gif, I don’t really work on a ton of layers, I like to commit to my strokes and if I mess up, I just paint over it. I got a piece of advice a long time ago from someone who said if you draw in pen all the time and don’t erase, over time you will just learn to not mess up as much. So I try to take that same advice with my paintings. Not to say I never use layers, I do, it’s just usually when I get near the end and at my polish stage.
Step 5: Finish.
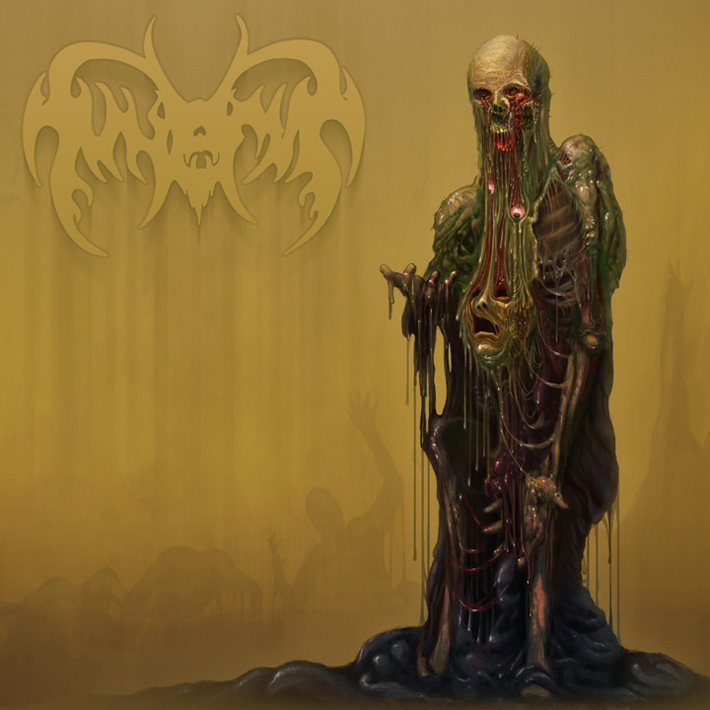
As you can see, the colors got a lot more desaturated and “yellow ochre”. I wanted it to give off a “sickly” or “vomitous” sort of vibe that would make you uneasy just by the color alone. In general, details are always just details. The most important part is the totality of the piece and the underlying structure, because if that part is messed up no amount of detail will save the piece. For the background, I kept it incredibly basic. Partially because of budget, but also because I didn’t want the background to be too busy seeing as the Sludgeman has so much detail in the first place. So I once again tapped my reference folder of favorite horror movies and imagery and I found myself really attracted to this classic still from John Carpenter’s “The Fog”.
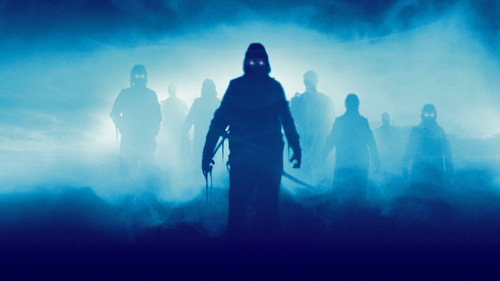
I love how the main figure is so stark, while everything else behind him is fading into the background. Seeing as I had this idea that basically the entire planet is being covered in yellow gas that is melting everyone it touches, I figured this seemed like a nice concept to, ahem, “borrow” for this cover only instead of a legion of angry ghost sailors, we have an entire population melting into the ground. As for the title text, I didn’t really have a vision for that so I let the layout artist handle that duty. So as you can see my final image does not contain that very important piece of the puzzle.
A lot of creating album covers (and all freelance art in general) is about problem solving. You have to consider the budget, the needs of the client, the fanbase, and if I do say so myself…my own personal satisfaction in creating the image. It’s all a balancing act to create an album cover that (hopefully) everyone will be pleased with. I’m pretty proud of this cover, because the band was cool enough to let me go wild and I got make something that I personally always look for in a good death metal album cover: something gory, evil, and nasty.
If you are interested in hearing more about Funerus or myself, please visit the links at the bottom of the page. Most importantly, thank you for reading! I hope to have more articles about album cover art like this in the future on Dose of Metal.
http://www.funerus.com/
http://www.reverbnation.com/funerus
http://www.facebook.com/pages/Funerus/160352007328842